Contents
Delivery Schedule User Guide
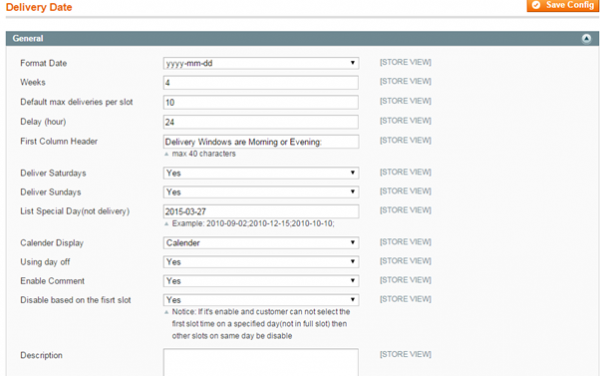
Admin can easily configure the Delivery Schedule module at Backend => Delivery Schedule => Configuration.
Configuration
- Format Date: Allow admin to choose format date. At Frontend, each time slot will be displayed as the selected format.
- Weeks: Maximum number of weeks that customers can select delivery date.
For example: When admin inserts 4 in this field, customers can select day in next 4 weeks from the current time.
- Default max deliveries per slot: Allow admin to set maximum number of bookings per slot.
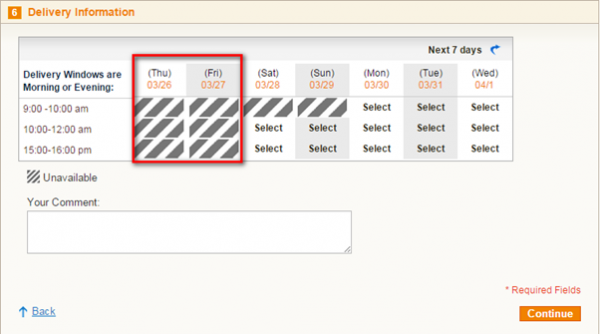
- Delay (hour): Enter the number of hours.
For example: When admin inserts 24, the current time is 17:00pm, 2015/03/26, then only slots after 24 hours counted from the current time (5 pm) will be enabled at Frontend. All earlier slots are disabled and customers can’t select.
- First Column Header: Title of Schedule in delivery information section on checkout page.
- Deliver Saturdays: Allow to deliver on Saturday or not.
- Deliver Sundays: Allow to deliver on Sunday or not.
- List Special Day (not delivery): Allow admin to enter the list of special days. Format of day must comply with the selected type at the [Format Date] tab.
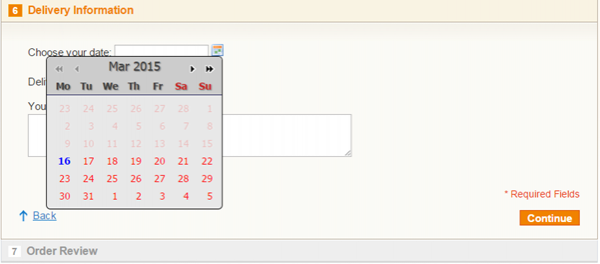
- Calender Display: Allow admin to select Calendar or Datetime Picker.
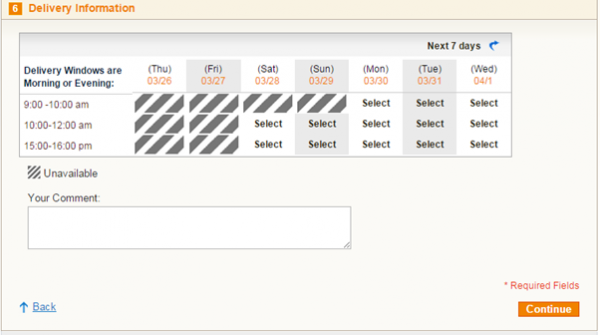
– If admin chooses Calendar, delivery information will be displayed at Frontend as follows:
– If admin chooses Picker, it will be at frontend:
- Using day off: If admin chooses Yes, the Day Off field of each item in Admin=>Delivery Schedule=>Manage Delivery Schedule will be shown. If No, the Day Off field will be hidden.
- Enable Comment: Allow customers to leave a comment.
- Disable based on the first slot: The first slot of the current day is disabled. At this field, if admin chooses YES, other slots on the same day are also disabled. If admin chooses No, the status of other slots does not depend on the first slot.
- Description: Description will be displayed below the schedule in Delivery Information at frontend-checkout page.
Manage Delivery Times
Go to Backend=>Delivery Schedule =>Manage Delivery Times.
Click on <Add Item>
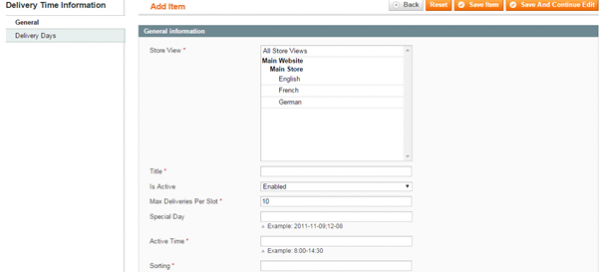
The Delivery Time Information page has 2 tabs named General and Delivery Days:
- In the General tab, admin can insert general information for one delivery time such as Store View, Title, Is Active…
+ Store view: The Delivery Time will be applied for the selected store view.
+ Title: Name of delivery time.
+ Is Active: The status of delivery time (Enabled/Disabled).
+ Insert a value to the Max Deliveries Per Slot field to limit the total number of deliveries per slot. The default value is taken from Configuration=>Delivery Date=> Default max deliveries per slot. Leave this field blank if there is no limitation.
+ Insert value for the Special Day field. Pay attention, it must be in accordance with format date selected at file Configuration=>Delivery Date=>Format Date.
This Special Day field is in higher priority than List Special Day (not delivery) in Configuration.
+ Active Time field specifies the time range for time slot to be in effect.
+ Sorting tab defines sorting of the delivery time displayed at Frontend.
- At the Delivery Days tab, admin can enable/ disable delivery days. If admin chooses YES, the day will be enabled; if NO the day will be disabled.
Manage Delivery Schedule
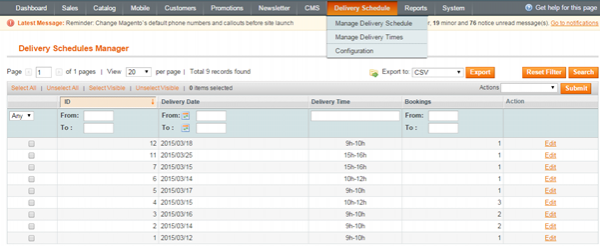
Go to Backend=>Delivery Schedule=>Manage Delivery Schedule.
This page lists all information of Delivery Schedule including ID, Delivery Date, Delivery Time, Bookings, Day off and Action.
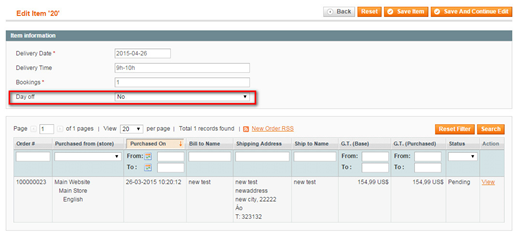
To see the detailed delivery schedule of each transaction, click “Edit”.
- Pay attention to Day off field, it is shown only when the status of Using day off field in Configuration is Yes.
If admin chooses Yes in Day off field, there is no delivery on this slot. If No, deliver as usual.
Email Integration
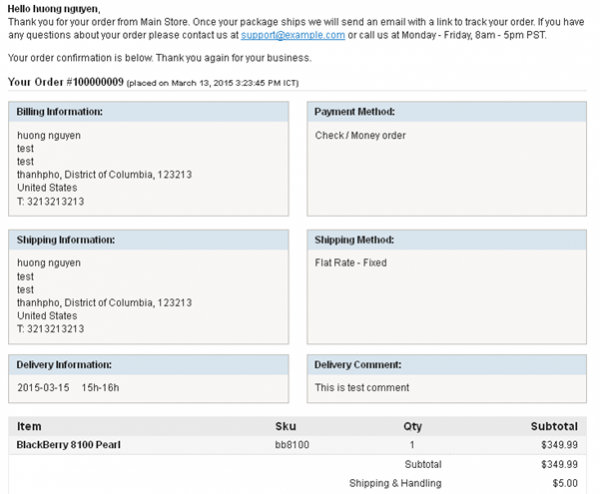
To integrate information of delivery schedule (including delivery date, delivery time and comment) in the New Order Confirmation Email when customer completes order, take step by step as below:
- Go to Backend =>System=>Transaction Emails=>Add new Template.
Create two templates:
– Template 1:
Template Name: New Order Delivery Date
Template Subject: {{varstore.getFrontendName()}}: New Order # {{varorder.increment_id}}
Template Content: Please open the file html_new_order_email.txt from .zip file and copy all content of it to here.
Template Styles: body,td { color:#2f2f2f; font:11px/1.35em Verdana, Arial, Helvetica, sans-serif; }
– Template 2:
Template Name: New Order Delivery Date for Guest
Template Subject: {{varstore.getFrontendName()}}: New Order # {{varorder.increment_id}}
Template Content: Please open the file html_new_order_for_guest_email.txt from .zip file and copy all content of it to here.
Template Styles: body,td { color:#2f2f2f; font:11px/1.35em Verdana, Arial, Helvetica, sans-serif; }
Note: Two files html_new_order_email.txt and html_new_order_for_guest_email.txt are in the same module package.
- Go to Backed=>System=>Configuration=>Sales=>Sales Emails=>Order tab. Change some attributes:
New Order Confirmation Template: Select "New Order Delivery Date"
New Order Confirmation Template for Guest: Select "New Order Delivery Date for Guest"
Revisions
- April 14, 2016 @ 18:04:22 [Current Revision] by admin
- April 14, 2016 @ 18:04:22 by admin
- April 14, 2016 @ 18:03:51 by admin



No comments yet.