About a month ago Cloudflare announced the general availability of Cloudflare Workers, a new feature to complement the existing Cloudflare product offering which allows the execution of JavaScript at the edge of Cloudflare’s CDN prior to the request hitting your own web infrastructure.
Cloudflare Workers runs JavaScript in the Google V8 engine developed for Chrome that can handle HTTP traffic written against the Service Worker API – This means they effectively sit in the middle of the request pipe-line to intercept traffic destined to your origin, from there they are able to manipulate the request in just about any way you see fit.
In this post, I’m demonstrating how a worker could be used to respond to web-requests, and display a static maintenance-mode page whilst a website has been taken offline for deployment (whilst permitting certain IPs to pass through for testing purposes). Obviously, this one example but I thought it would be a neat idea to replace the F5 maintenance iRule I wrote about in a previous post.
An example execution workflow:
- Maintenance mode Worker code deployed to Cloudflare and appropriate routes are created
- Deployment pipe-line begins – PowerShell script calls Cloudflare API and enables the worker for specific routes
- Cloudflare intercepts all requests to my website and instead responds with the static under maintenance page for ALL URL’s
- Deployment pipe-line completes – PowerShell script calls Cloudflare API and disables the worker for specific routes
- Web requests for my website now flow down to the origin infrastructure as per normal
Easy right? Let’s work through the deployment of it.
The rule logic:
The worker rule example is pretty simple! – Intercept the request, If the contents of the cf-connecting-ip header is a trusted IP address then allow them to down to the origin for testing purposes. If cf-connecting-IP is a non-trusted IP address then show the static maintenance page (note the omitted/highlighted images in the example below, see repo for full source):
|
1
2
3
4
5
6
7
8
9
10
11
12
13
14
15
16
17
18
19
20
21
22
23
24
25
26
27
28
29
30
31
32
33
34
35
36
37
38
39
40
41
42
43
44
45
46
47
48
49
50
51
52
53
54
55
56
57
58
59
60
61
62
63
64
65
66
67
68
69
70
71
72
73
|
addEventListener("fetch", event => { event.respondWith(fetchAndReplace(event.request))})async function fetchAndReplace(request) { let modifiedHeaders = new Headers() modifiedHeaders.set('Content-Type', 'text/html') modifiedHeaders.append('Pragma', 'no-cache') //Return maint page if you're not calling from a trusted IP if (request.headers.get("cf-connecting-ip") !== "123.123.123.123") { // Return modified response. return new Response(maintPage, { headers: modifiedHeaders }) } else //Allow users from trusted into site { //Fire all other requests directly to our WebServers return fetch(request) }}let maintPage = `<!doctype html><title>Site Maintenance</title><style> body { text-align: center; padding: 150px; background: url('data:image/jpeg;base64,<base64EncodedImage>'); background-size: cover; -webkit-background-size: cover; -moz-background-size: cover; -o-background-size: cover; } .content { background-color: rgba(255, 255, 255, 0.75); background-size: 100%; color: inherit; padding-top: 1px; padding-bottom: 10px; padding-left: 100px; padding-right: 100px; border-radius: 15px; } h1 { font-size: 40pt;} body { font: 20px Helvetica, sans-serif; color: #333; } article { display: block; text-align: left; width: 75%; margin: 0 auto; } a:hover { color: #333; text-decoration: none; } </style><article> <div class="background"> <div class="content"> <h1>We’ll be back soon!</h1> <p>We're very orry for the inconvenience but we’re performing maintenance. Please check back soon...</p> <p>— <B><font color="red">{</font></B>RESDEVOPS<B><font color="red">}</font></B> Team</p> </div> </div></article>`; |
Deploy the Worker
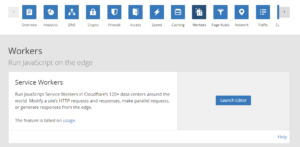
To deploy the above rule – Select Workers from the Cloudflare admin dashboard under one of your domains and launch the editor:
Add the worker script into the script body.
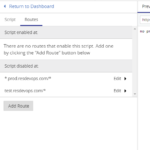
Select the Routes tab and individually add the routes you want to display the maintenance page on (note you can use wild-cards if required:
To enable your maintenance page – it’s as simple as toggling turning the route on, within minutes Cloudflare will deploy your JavaScript to their edge and invoke it for any request that matches route patterns you previously set. The maintenance page will display to everyone accessing your site externally, whilst you are still able to access due to your white-listed address:
Just like Cloudflare’s other services, Workers are able to be configured and controlled using their V4 API – We can toggle the Worker’s status using a simple PowerShell call. e.g:
|
1
2
3
4
5
6
7
8
9
|
#Generate JSON payload + convert to JSON (Setting as a PSCustomObject preserves the order or properties in payload): $ApiBody = [pscustomobject]@{ id = $workerFilterID pattern = "resdevops.com/*" enabled = $true }|Convertto-JsonInvoke-RestMethod -Uri "https://api.cloudflare.com/client/v4/zones/$($zoneId)/workers/filters/$($workerFilter.Id)" -Headers $headers -Body $ApiBody -Method PUT -ContentType 'application/json' |
I’ve published the full source along with a script to toggle the maintenance using PowerShell and the Cloudflare API here https://github.com/coaxke/CloudflareWorkersMaintenance
Workers are pretty powerful, and there’s plenty you can do at Layer7!
Revisions
- February 22, 2021 @ 14:28:53 [Current Revision] by Sharing Solution
- February 22, 2021 @ 14:28:13 by Sharing Solution


No comments yet.